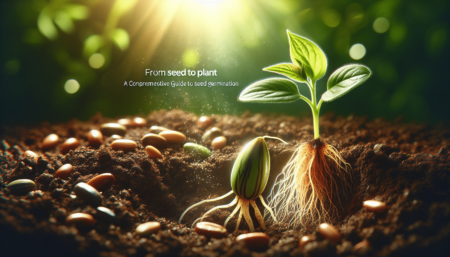
- Introduction
- Direct sowing vs. pre-cultivation
- Methods of seed germination
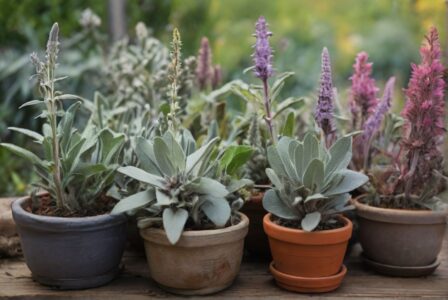
- Select sowing material and substrate
- The right temperature and light for germination
- Pricking out and repotting
- Growing tips for healthy and strong plants
1. introduction
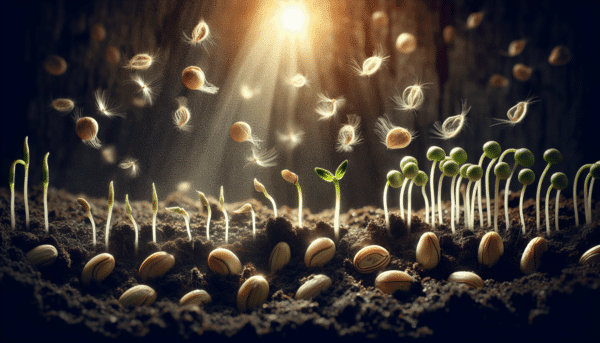
Germination is the first step in the development of a seed, in which a small seed develops into a fully-fledged plant. This process includes the growth of the embryo within the seed, starting with the breakthrough of the radicle until the formation of the young plant[1]. Certain conditions must be met for this crucial phase, including heat, water and oxygen; in some cases, light or its absence is also necessary [1]. In addition, some seeds have a dormancy period in which specific environmental conditions are required to break dormancy and initiate germination [1].
In this article, you will learn how to germinate seeds successfully, from choosing the right sowing material and substrate to specific temperature and light requirements. Various methods of seed germination are presented, including direct sowing and pre-cultivation, as well as essential growing tips to achieve healthy and strong plants. Whether it's fruit, hybrid or flower seeds you want to harvest, this guide will help you plant and germinate your seeds effectively so your garden can flourish with plenty of ovaries and endosperm [2][3].
2. direct sowing vs. pre-cultivation
Direct sowing
Direct sowing is particularly suitable for plants with sensitive roots such as carrots, beet and radishes [4]. This method allows the plants to maintain a natural connection with soil bacteria, which supports growth [4]. Another advantage of direct sowing is that it avoids the stress of transplanting [5]. It also enables earlier sowing and harvesting, which is particularly useful for short growing seasons [6]. In addition, the young plants are better protected from harsh weather conditions and pests by direct sowing [6].
Pre-culture
Pre-cultivation, on the other hand, offers better control over growing conditions such as temperature and soil composition [6]. It is recommended for slow-growing plants, heat-loving vegetables and some summer flowers [4]. Pre-cultivation can be carried out in different temperature ranges: Cool pre-cultivation (12 to 16 °C) is suitable for broad beans, peas, carrots, lettuce, parsnips, radishes, radishes and spinach [7]. A medium heat requirement (16 to 20 °C) is suitable for cauliflower, broccoli, chicory, kohlrabi, fennel, chard, May and autumn turnips, leeks, parsley, beet, chives, celery, onions and savoy cabbage [7]. Warm cultivation (22 to 26 °C) is ideal for Andean berries, eggplants, bush and runner beans, cucumbers, melons, pumpkins and zucchinis, peppers and chillies, tomatoes and sweetcorn [7].
Some plants such as radishes and spinach can be sown directly in the garden if the soil conditions are suitable [8]. This shows that the choice between direct sowing and pre-cultivation depends on the specific requirements of the plant species and the prevailing environmental conditions.

3. methods of seed germination
Classic method: water and heat
- PreparationStart by soaking the seeds in water. This helps to speed up germination by softening the seed coat [9].
- SurroundingsKeep the seeds in a warm environment afterwards to stimulate germination. A constant heat source is crucial for the success of this method [9].
Stratification and scarification
- StratificationThis method mimics natural conditions and is particularly suitable for hard-shelled seeds. Mix the seeds with sand or a sand-peat mixture, moisten them and store them in boxes that are exposed to winter conditions but protected from direct sunlight [10].
- ScarificationRemove the seed coat or use sand to facilitate root growth. This is particularly beneficial for seeds with a hard, impermeable seed coat [10].
Plant hormones and heat treatment
- Plant hormonesGibberellic acid can be used to promote germination, especially in seeds that have a dormant phase [10].
- Heat treatmentSome vegetable seeds, such as cucumbers, carrots, peas, beans, celery and cabbage, benefit from heat treatment before sowing. Immerse the seeds in 50°C water for 30 minutes, which accelerates germination and makes the seedlings more resistant to fungal diseases [10].
Other methods
- Camomile teaSoaking the seeds in lukewarm chamomile tea for 12 to 24 hours can reduce the risk of fungal infections and promote germination, especially with larger seeds [10].
- Valerian bathValerian promotes root growth and can be particularly beneficial for sowing sensitive seeds such as cucumbers or zucchinis [10].
- Cold treatmentMany perennial plants require a cold period for germination. This can be achieved by sowing the seeds in pots in the fall, keeping them moist at room temperature for two weeks and then placing them in the refrigerator (0 to 5 °C) for 4 to 8 weeks [10].
These methods offer different approaches to improve the germination capacity of seeds and grow healthy plants.
4. select sowing material and substrate
Choosing the right sowing material and substrate is crucial for successful germination. Start by choosing a high-quality, crumbly soil that is rich in humus and low in nutrients to promote root development [15]. Cultivation soil, such as that from Neudorff, is ideal for sowing as it is free of residues, microorganisms and fungal spores and is not fertilized, creating an optimal environment for the seedlings [17].
Recommended substrates and their application
- Rock wool and peat pelletsThese substrates are suitable for germination and support healthy root development [14].
- Special substrates for sensitive plantsFor cyclamen, a substrate mixture of 95% sieved white peat, 10% fine sand and 500g PG Mix per cubic meter of substrate is recommended. This mixture supports uniform germination and healthy growth [13].
- VermiculiteCan be used as a covering substrate, but requires more frequent watering [13].
Optimal storage and preparation of seeds
- StorageKeep seeds in a dark, cool and airy place, ideally at a temperature between 0 and 10 degrees Celsius [15]. Check the expiry date on the seed packet, as the germination capacity of the seeds decreases over time [15].
- Seed preparationCover the seeds with a thin layer of soil, depending on their size. For very fine seeds, such as carrot seeds, they should be sown very shallowly [15]. Make sure that the soil is kept evenly moist during germination [15].
By using specialized substrates that are low in nutrients and following the correct storage and preparation guidelines, you can promote the health and strength of your plants right from the start.
5. the right temperature and light for germination
Optimal temperature conditions
- Initial conditionsAdequate warmth is essential for germination. The ideal starting temperature for most seeds is between 10 and 20 °C [7].
- Medium heating requirements: After germination, the seedlings should be cultivated at moderate temperatures of 16 to 20 °C to promote healthy growth [7].
- Warm cultivation: Temperatures between 18 and 20 °C are ideal for heat-loving plants such as tomatoes and peppers [7].
Light requirement for germination
- Light germinator vs. dark germinatorSome seeds, known as light germinators, require light to initiate germination, while dark germinators germinate in the dark [19]. It is important to know the specific light requirements of your seeds and act accordingly.
- Light sourcesIf no natural light is available, a plant lamp can be used to provide the seeds with the necessary amount of light [17]. This is particularly useful during the darker months or in homes with little daylight.
- Avoidance of wastageTo prevent seedlings from growing long and thin, they should be sufficiently illuminated. Ideally, use UV light lamps for this purpose [18].
Care of the seedlings
- Moisture and heat: Ensure even humidity and avoid direct heat sources under the growing containers to prevent overheating [18].
- Cultivation soilUse a specialized potting soil with a low nutrient content to promote root growth [8].
- Growing stationFor a professional approach, you can set up a seedling nursery with LED grow lights, ideally in a cool, dark cellar. Gradually acclimatize the seedlings to outdoor conditions before transplanting them to the garden [20].
6. pricking out and repotting
Pricking out: When and how?
- When to prick out?
Prick out the seedlings as soon as the first true leaves appear. This promotes optimal growth of the young plants [21]. - Preparation of the substrate:
Use a peat-free, humus-rich and only lightly fertilized substrate such as sowing soil or potting soil. Fill the container up to two thirds full and press it down lightly. Then cover it up to the edge with sieved sowing soil and smooth the surface [22]. - Transplantation process:
Make a hole in the soil with the pricking-out stick. Carefully lift the plant out of the original soil with the pricking-out stick, place it in the hole and cover the entire root with soil. Press the soil firmly around the plant and smooth the surface. Repeat the process for other seedlings about 2 cm apart or in another pot [22]. - Irrigation:
Water the plants thoroughly with a watering can fitted with a fine spray to ensure even moisture [22].
Repotting: specific requirements and care
- Tomatoes and peppers:
When repotting tomatoes and peppers, the plants should be placed deeper into the soil so that only the first pair of leaves remains visible. This provides additional stability and promotes strong root growth [24]. - Kohlrabi:
Kohlrabi should not be planted too deep, as the tuber grows above the surface of the soil. Make sure that the plant is planted at the same depth as before so as not to disturb the formation of the tuber [24]. - Salad:
Lettuce can be sown directly into the soil or transplanted as a seedling. If transplanted, the lettuce can be planted a little deeper, which promotes the formation of heads or tubers [24].
Care after pricking out
- Temperature requirements:
Place the repotted plants in an area that meets their temperature requirements - 15 to 18 degrees for summer flowers and vegetables, 20 degrees for houseplants and 22 degrees and above for tropical plants [22]. - Hardening:
Gradually acclimatize young plants to outdoor conditions by initially placing them in a sheltered spot for a few hours each day. Gradually increase their exposure to outdoor conditions until they are ready to be transplanted into the garden [23].
7. growing tips for healthy and strong plants
Optimization of the germination conditions
- Pre-germination in warm conditionsStart the pre-germination of your plants in February or March. Place the containers in a warm place to create optimal conditions for growth [4].
- Observe sowing datesThe specific sowing dates vary depending on the plant species and are indicated on the seed packets. This helps you not to miss the ideal time for sowing [6].
- Implementation after the last frost: After the last frost, which occurs around the Ice Saints' Day in May, the pre-grown plants can be transferred to the garden, raised bed or pot [4].
Use of heating mats
- Heat supplyHeating mats provide the necessary warmth for seeds to germinate and young plants to thrive. They can be used in various environments, such as in homes, greenhouses and on balconies [25].
- Temperature optimizationThe optimum temperature for germination varies depending on the type of plant. Heating mats help to precisely control these conditions [25].
Moisture management and acclimatization
- Moisture retentionDo not allow the seeds to dry out after sowing. Use a watering spray for watering to prevent seeds from being washed away. Covering the trays with a transparent film helps to retain moisture and reduces the need for frequent watering [17].
- Labeling the seedsIt is important to label the seeds sown to keep track of what was sown and when. This makes it easier to identify the plants as they grow [17].
- Acclimatization of the seedlings: Before the seedlings are planted outside, they must be acclimatized to outdoor conditions. This is done by gradually exposing them to mild, sunny days and gradually increasing their exposure to sunlight, wind and rain [17].
Further questions and answers on seed germination
1. how does a seed develop into a plant?
In order for a seed to grow into a plant, it needs specific conditions such as warmth, water and oxygen. A period of dormancy is also often required, in which the seed remains inactive for a certain period of time before germination begins.
2. what is necessary to germinate a seed?
Several conditions are essential for the successful germination of a seed: heat, water, light (or its absence) and oxygen. The heat ensures that the ambient temperatures are ideal for the seedling to develop.
3. how can you grow plants from seeds?
Start by preparing a groove in the soil, the depth of which you can see from the instructions on the seed packet. Spread the seeds in the groove, cover them with soil, press them down lightly and moisten them carefully with a watering can. The first seedlings should appear within a few days.
4. how to plant germinated seeds?
As soon as the seeds have burst open and a small, white taproot is visible, they are ready for planting. Plant the germinated seeds with the taproot facing downwards to a depth of about 3-5 mm so that the seedlings do not have to reorient themselves.
Youtube
References
[1] – https://www.pflanzenforschung.de/de/pflanzenwissen/lexikon-a-z/keimung-der-samen-283
[2] – https://de.wikipedia.org/wiki/Keimung
[3] – https://www.spektrum.de/lexikon/biologie-kompakt/samenkeimung/10194
[4] – https://www.kiepenkerl.de/kiepenkerl-blog/vorkultur-gemuese-vorziehen/
[5] – https://medium.com/alphabeet/mein-eigenes-gem%C3%BCsebeet-vorkultur-vs-direktsaat-6d65795584ca
[6] – https://fryd.app/magazin/vorziehen-direktsaat
[7] – https://www.mein-schoener-garten.de/gartenpraxis/nutzgaerten/gemuese-aussaat-die-richtige-temperatur-fuer-die-vorkultur-28391
[8] – https://www.mein-schoener-garten.de/themen/aussaat
[9] – https://www.gardenshaman.eu/2024/01/31/samen-zum-leben-erwecken-faszinierende-methoden-zur-keimung/
[10] – https://www.garten-haus.at/content/garten-freizeit/garten-haus/de/tipps_praxis/2020/04/tricks-fuer-eine-bessere-keimung.html
[11] – https://de.serlo.org/nachhaltigkeit/51392/keimung-und-wachstumsbedingungen
[12] – https://fastercapital.com/de/inhalt/Ultimative-FAQ-Fruehe-Saatstadien–Was–Wie–Warum–Wann.html
[13] – https://www.cyclamen.com/de/fachbereich/kultur/10/8
[14] – https://www.hanfoase.at/blog/hanfsamen/cannabis-samen-keimen-lassen-grundlagen-und-methoden/
[15] – https://www.mein-schoener-garten.de/gartenpraxis/5-gruende-warum-samen-nicht-keimen-34591
[16] – https://opendata.uni-halle.de/bitstream/1981185920/95339/1/hercynia_volume_41_2915.pdf
[17] – https://www.garten-fraeulein.de/tipps-fuer-eine-erfolgreich-anzucht/
[18] – https://www.kistengruen.de/wp/2019/03/vom-samen-zur-pflanze-tipps-fuer-eine-erfolgreiche-anzucht/
[19] – https://www.plantura.garden/gruenes-leben/wissen/lichtkeimer-und-dunkelkeimer
[20] – https://www.anjasgartenreich.de/rund-ums-g%C3%A4rtnern/5-tipps-f%C3%BCr-die-jungpflanzenanzucht/
[21] – https://www.mein-schoener-garten.de/themen/pikieren
[22] – https://www.ndr.de/ratgeber/garten/Pikieren-Darauf-kommt-es-beim-Vereinzeln-von-Pflanzen-an,pikieren100.html
[23] – https://www.bionana.shop/alles-was-du-uebers-pikieren-und-umtopfen-wissen-musst/
[24] – https://fryd.app/magazin/pikieren
[25] – https://www.samenhaus.de/gartenblog/heizmatten-optimale-temperaturen-fuer-pflanzen